October 2006 Cub Scout Roundtable Issue |
Volume 13, Issue 3
November 2006 Theme |
Theme: Cubs in Shining Armor
Webelos:
Craftsman & Scientist
Tiger Cub Activities |
PACK AND DEN ACTIVITIES
Go to a Renaissance Faire
Commissioner Dave
Renaissance Faires are where many people come in costume and spend the day reliving the time of chivalry and knights. My family and I regularly attend the Pennsylvania Renaissance Faire (See website below). We see Shakespearean plays snippets, eat turkey legs, participate in old time games and dancing, listen to folk music from the era and much more as we walk around and look at knights in armor, the ladies in their fancy dresses, wenches and pirates.. One year we witnessed the rivalry between Queen Elizabeth and Mary, Queen of Scots through jousts, human chess games, sword fights and other events. This year there were two noblemen courting Queen Victoria who were competing (in strangely enough) the exact same events.. We were there on Pirates Weekend and there was a boat race people were paying to play – It was a Cub Scout Raingutter Regatta. The boats were unmistakable even though they were painted to be pirate ships.
So I went looking and found some websites for Renaissance Faires -
Texas Renaissance Festival, Plantersville, TX
http://www.texrenfest.com/main.htm
(There are at least four other Ren Faires in Texas)
Pennsylvania Renaissance Festival
http://www.parenfaire.com/
Maryland Renaissance Festival
http://www.rennfest.com
Then I found these sites that have lists of Renaissance Faires from all around the country. Some are one weekend events, some are like the Pennsylvania Faire that are every weekend for 10 weeks or so.
http://www.verymerryseamstress.com/renaissancefaires.htm
http://www.faires.com/
http://www.faire.net/SCRIBE/WebScribe.htm
http://www.renaissance-faire.com
http://www.renaissanceinfo.com
the periodical Renaissance Magazine
So if you are not holding your own event, maybe you can go and see one of these.
Advancement Opportunities
Sam Houston Area Council
Tiger Activities
- Achievement 1G – Go to a fair, like the Renaissance Festival
- Elective 8 – Your religious leaders
- Elective 49 – Your government
- Start religious emblem
Wolf Achievements and Electives
- Achievement 11 – Duty to God
- Elective 2 – be an actor
- Start religious emblem
Bear Achievements and Electives
- Achievement 1 – Ways we worship
- Achievement 2 - Start religious emblem
- Elective 10 – make knight helmets
Webelos Activity Ideas
- Requirement 8b – start religions emblem
- Craftsman Activity Badge
- Scientist Activity Badge
Knight Helmets
Heart of America Council
Materials:
- 1 gallon round plastic bottle
- 1 gallon square plastic bottle
- sharp knife
- foil tape
- awl
- brads
Directions:
- Remove neck, handle and bottom from round bottle.
- Cut away an arch-shaped section from the side opposite the handle. Make it big enough so the face can be seen.
- Cover the helmet with foil, taped on.
- For visor, cut 2 sides from the square bottle. The corner of the bottle gives the visor a perfect shape to permit lifting from the helmet. Either leave visor solid or cut out opening in center.
- Punch holes in ends of visor and in sides of helmet – fasten together with brads. Tape ends of brads so they won’t scratch boys’ faces.
- Add plume of foil, crepe paper, construction paper or feathers.
Another Knight Helmet
Heart of America Council
Materials:
- 1 - 3-gallon ice cream carton
- sharp knife
- silver spray paint
- brads
- cardboard
Directions:
- Cut face opening from ice cream container. Spray paint silver.
- Cut face guard from cardboard. Cut out slits.
- Fasten face guard to helmet with brads.
Knight Costume
Heart of America Council
Base
For basic costume, use pajama bottoms, thermal underwear, uniform pants or leotards, with matching socks pulled up over pants and fastened with rubber bands.
Tunic:
Cut from fabric or crepe paper. Seam, glue or staple, leavingarmholes. Add coat of arms design, if desired, with magic markers or glue on construction paper emblem.
Epaulets
Use curved sides of 2 1-lb. oatmeal boxes. Remove top and bottom of box, cut down to 6” length. Run bias tape between the two across in front and back of neck. Paint as desired.
Breastplate:
Cut from cardboard. Make fold in center and cut to taper at ends, to fit around arms and hips. Attach bias tape ties at back. Paint with metallic paint. Add coat of arms or jewels.
PLASTIC ARMOR
Grand Canyon Council
- To make armor cut rectangles about 3x4 inches (or larger if you don’t want to piece too many together.)
- Punch holes in the edges, paint them gray, and connect the pieces with yarn.
- Decorate as desired.
- Assemble like for a breastplate and a back plate, leave sides open and connect front to back with yarn.
- Have child wear gray sweats underneath if it is to be used as a costume.
KNIGHT’S SHIELDS
Sam Houston Area Council
Grand Canyon Council
Materials:
- Cardboard
- scissors
- knife
- acrylic paints
- silver spray paint
- Velcro strap
- Sharpie
Every knight must have his own shield. They were used for protection and for identification. A knight in full armor would be hard to identify, so the shield would display his personal colors and symbols.
Directions
- Cut the shield to the desired shape.
- Cut two 1” slits, that are about 5” apart, near the middle and one above the other, so that later you can slide the Velcro strap through it.
- Spray paint the shield, and let it dry,
- Have boys add decorations of their choosing.
Coat of Arms
Heart of America Council
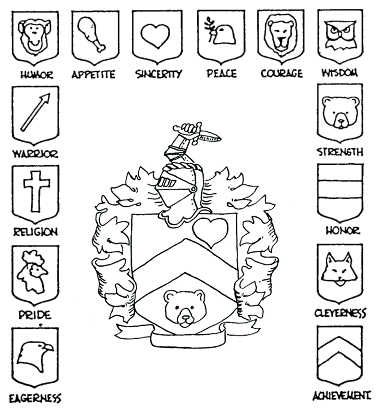
To have a personal Coat of Arms was the custom in many countries to identify their name by suing a shield or “coat of arms”. Design your very own. Decoration Ideas for Coats of Arms and Shields Heart of America Council,
Grand Canyon Council,
Sam Houston Area Council In “coats of arms” and heraldry, every color and symbol has meaning. Encourage the boys to come up with their own colors and symbols, and explain their meanings. Here are some examples of what the colors and designs on ancient knights’ coats of arms meant: Colors Yellow or gold - Generosity and elevation of the mind White or silver - Peace and sincerity Blue - Loyalty and truth Red - Military fortitude and magnanimity Black Constancy or grief Green - Hope, joy & sometimes loyalty in love Purple - Royal majesty, sovereignty and justice Orange Worthy ambition Maroon Patient in battle, and yet victorious Symbols   
Cross or Chevron - Protection Crescent – Honored by the king Lion or panther – Great courage Tiger - Great fierceness and valor Bear - Ferocity in the protection of family Wolf – Valiant leader Leopard - Valiant and hardy warrior Horse - Readiness for all employments for
king and country. Lamb - Gentleness and patience under suffering Ram - Authority Dog - Courage, vigilance, loyalty, and fidelity Camel - Patience and perseverance Tortoise - Invulnerability to attack Heart - Charity, sincerity Pen - Emblematic of the liberal art of writing and
of learned employments. Double Eagle and Eagle -Signifies a man of action,
ever more occupied in high and weighty affairs, and one of lofty spirit, ingenious, speedy in apprehension and judicious in matters of ambiguity. KNIGHT’S HELMET
Grand Canyon Council
What You Need:
- Gallon milk carton, washed, rinsed, and dry
- Scissors
- Craft paint in colors desired
- Paintbrush
- Hole punch (for visor)
- Sheet of acrylic such as Shrinky Dinks (for visor)
- 2 Metal brads (if visor is desired)
- Miscellaneous supplies, as needed by individual project
Directions:
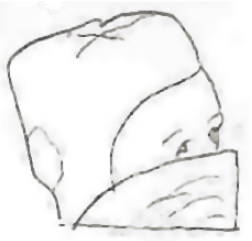
- Hold the milk carton upside down by the handle.
- Look at the photograph as a guide, and cut all the area where the handle resides and the milk carton top off with the scissors.
- Our particular milk carton actually had a difference in texture on the carton where we cut and that gave us the basic shape of the helmet.
- You should have a "helmet" that a child can put on their head.
- Trim off any sharp points.
- Paint the helmet on the outside and then let dry.
- Cut a piece of plastic to make visor and paint and draw lines to look like a visor.
- Attach visor with brads.
1-PIECE ARMOR
Grand Canyon Council 
In its most basic form, Costume Armor can be created by folding a big piece of cardboard and cutting a hole in the middle for the head to fit through. (You can use other materials but it's hard to beat the cost of cardboard.) It should be as wide as the boys shoulders and twice the length from their knees to their shoulders. Knight’s Sword & Shield Tie Slide
Heart of America Council 
Materials:
- Sheet metal
- Tin snips
- File
- 1/8” thick piece of wood
- sand paper
- paint
- glue
Directions:
- Trace the shield pattern onto a piece of sheet metal(hobby shop), and cut out with tin snips.
- File the rough edges smooth. Bend the shield slightly so that it bulges outward.
- Trace the swords outline onto a 1/8” thick piece of wood and whittle it out – white pine or basswood is best. Sand the sword smooth.
- Use enamel or acrylic paint on both the sword and shield. Paint the handle gold and the blade sliver. Use the design here or create your own.
- Glue the sword to the back of the shield with epoxy or modeling cement.
- Then glue a sheet metal loop to the back.
FIELD TRIPS
Heart of America Council
- Visit a historic location – how did they celebrate Thanksgiving?
- Visit a sports game – any similarities to old English competitions?
SERVICE PROJECTS
Heart of America Council
- Read to seniors.
- Play games or cards with seniors.
- Make tray favors for Meals on Wheels or hospital.
- Take dinner to an elderly person.
HIKES
Heart of America Council
- Sealed Order Hike: Divide boys into groups. First group lays trail using notes that give directions on where to go and what to do on the way.
- Shadow Hike: Walk only in the shadows. This may require some jumping. (Don’t plan this hike at noon since that is when shadows are the shortest!)
- String Hike: Follow a string, laid out in advance. Have nature objects along the way to identify.
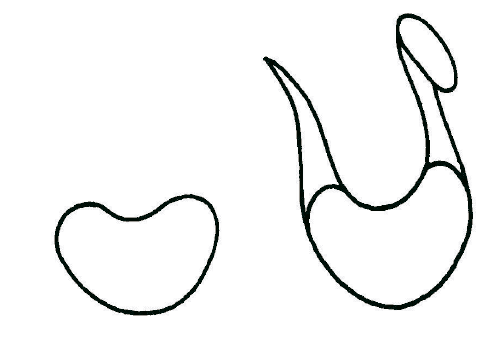
Cork Knight
Heart of America Council

Materials:
- 2 corks from bottles
- poster paints
- clear nail polish
- brush
- single-edged razor blade
- glue
- pencil
- tape measure
- newspapers
Directions:
- Spread newspaper on working area.
- Draw a line 1/4” from the bottom, around one of the corks.
- With an Xacto knife (Get adult help), cut off about 1/8” of the cork from the line to the bottom of the cork.
- This part of the cork, which is thinner than the rest, will be the neck of the knight.
- Glue corks together with the neck part of cork attached to the untouched cork.
- Paint the bottom cork all one color. Leave the neck of the knight unpainted. Paint the top of the cork with face as shown.
- The top 1/3rd should be all one color for a hat, the rest all black except for the place where the knight’s face will be.
- Paint in the facial features.
- When the paint is dry, cover the knight with clear nail polish.
Draw a Dragon
Heart of America Council
Make your own paper:
Sam Houston Area Council
- Find just about any kind of use paper. Newspaper, computer print-outs. Don’t use magazine-type of glossy paper. Tear up this paper into small strips.
- Put paper strips into a blender (half-full). Fill the rest of the way with warm water and chop it up into a slurry.
- Fill a large bowl with three blender loads of paper slurry, and add a tablespoon of liquid starch. Mix well.
- Lay a screen, stretched on a frame, into a large cookie sheet with raised sides. Pour the paper slurry over the screen and move the screen back and forth to get an even coating of paper pulp.
- If it looks evenly distributed, and is the right thickness (it can range from very thin to extremely thick), then raise the screen above of the slurry and let it drip until most of the water has drained from the paper.
- Lay a piece of flannel or felt down on a flat surface and tip the screen over onto it, so that the paper is touching the fabric.
- With a sponge, push down gently all over the screen to remove excess water.
- Then carefully lift the screen off of the new sheet of paper and let the paper dry fully.
DRAGON
Grand Canyon Council
Make your dragon as short or as long as you wish. You can add jewels or sequins to dress it up.
What You Need:
Paper egg carton Scissors
Hole punch Yellow craft paint
Black craft paint 7mm Wiggle eyes
1/4" White pom-poms Red felt scrap
Tacky glue 2 Jingle bells(1/2")
Ribbon (1/4" wide) Craft paint and brushes or crayons
Directions:
- Cut the cups apart on the egg carton.
- Even out the edges so the cup will sit evenly upside down on the table.
- Paint the inside of one cup black for the inside of the mouth.
- Paint the outside yellow.
- Using as few or as many cups as you wish, paint the outside of the cups yellow. Let dry.
- Using the daubers, let the children paint different color dots on the yellow cups. Let dry.
- Hole punch 2 holes in each cup directly across from each other.
- Lace the ribbon through the holes to tie the dragon together.
- Tie a jingle bell on each end of the ribbon.
- Glue the head on the dragon.
- Note: You may need to "prop" the head up while it dries.
- Cut a red tongue out of felt and glue inside of mouth.
- Glue 2 pom-poms on top of the head
- Then glue 2 wiggle eyes attaching them to the pom-poms. Let dry.
- If you like, you can add a "leash" through the hole of the dragon to walk it around.
CARDBOARD BOX CASTLE
Grand Canyon Council
 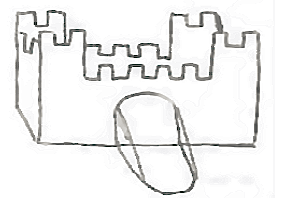
Turn a plain cardboard box into an enchanted castle.
What You Need:
- A box - any size will do
- Heavy duty scissors and / or a craft knife
- string, crayons, paint, and/or markers
Directions:
- Find a box and cut off the top flaps. Any type of box will do: a large cardboard box makes a large castle, a shoebox makes a fine, small castle.
- Cut out a wide rectangle along the front, sides, and the back to form towers (turrets) at the corners.
- Cut out rectangular crenellations along the entire top (the battlement) of the castle.
- Draw a drawbridge at the front of the castle.
- Using the point of scissors, poke 2 small holes in the sides of the drawbridge and on both sides of the wall next to it.
- Cut out the drawbridge.
- Attach a string to each side of the drawbridge and the adjoining wall.
- Decorate the castle with paint, markers, crayons, or decoupage (paste pictures from magazines or clipart).
If you want round turrets in the corners – gather up some TP or wrapping paper rolls
Quill Pen for the King’s Scribe:
Sam Houston Area Council

For thousands of years, right up until just over 100 years ago, the only pens in the world were made from the feathers of birds.
Materials: turkey feathers, sharp knife
- At the sharp tip of a large feather, carve off the point of the quill at a sharp angle.
- At the longest point of the quill now showing, cut a slit in the quill about a ¼”.
- Finish the tip of the pen by carving away the two sides of the quill that will make the tip have a pointed end (without getting too near the slit that you carved.
- Dip the tip in an ink well (or small bottle of ink), dab excess onto a paper towel and then write on paper.
Make Your Own Permanent Ink:
Sam Houston Area Council
Why buy ink for your quill pen, when you can make your own?
Berry Ink: Mash a ½ cup of fresh berries and pour through a strainer to yield just juice. Add ½ teaspoon of vinegar and ½ teaspoon of salt and mix well. Pour into baby food jars for use as ink wells.
Walnut Ink: Put the shells from a dozen black walnuts into a plastic freezer bag. Hammer the shells lightly until they are in very small pieces. Put all of the shell pieces and fragments into a sauce pan and barely cover them with water. Simmer for ½ hour and then let the pan sit and soak overnight. Strain the liquid. Add ½ teaspoon of vinegar to keep the color strong. Pour into baby food jars as ink wells.
Invisible Ink: Pure lemon juice makes excellent invisible ink. Write your message on a piece of paper with your quill pen, and let it dry. It will disappear like magic. To see the message, heat the paper up (carefully).
Now, try some calligraphy…
Materials found in Baloo's Bugle may be used by Scouters for Scouting activities provided that Baloo's Bugle and the original contributors are cited as the source of the material.
Materials found at the U. S. Scouting Service Project, Inc. Website ©1997-2006 may be reproduced and used locally by Scouting volunteers for training purposes consistent with the programs of the Boy Scouts of America (BSA) or other Scouting and Guiding Organizations. No material found here may be used or reproduced for electronic redistribution or for commercial or other non-Scouting purposes without the express permission of the U. S. Scouting Service Project, Inc. (USSSP) or other copyright holders. USSSP is not affiliated with BSA and does not speak on behalf of BSA. Opinions expressed on these web pages are those of the web authors.
|
|