July 2008 Cub Scout Roundtable Issue |
Volume
14, Issue
12
August 2008 Theme |
Theme:
S'MORE SUMMER FUN
Webelos:
Forester & Naturalist
Tiger Cub
Activities |
PACK AND DEN ACTIVITIES
S'More Ways to Have Fun
Alice, Golden Empire Council
ü
Be sure you start
out by reviewing Safety in the Sun and taking the Safe Swim training available
online from BSA. Remind everyone of the Buddy System and test them often to see
if they are with their buddy. Make sure sunscreen, shade and water are
available whenever you gather in the Summertime
ü
This is a great time
to review Campfire Safety and it can be fun and tasty, too, if you use a
graham cracker for the dirt, raisins for the fire circle, shredded coconut for
the tinder, small pretzel sticks for the kindling, larger pretzel sticks for the
fuel, a glass of water for the water you should have nearby a campfire, a spoon
for the shovel (to bury the fire), and red hearts for the flame. As you go
through the procedure, give out the ingredients each boy makes a campfire is
completed, and then gets to eat it. Older boys can practice making different
kinds of fires, such as teepee or log cabin.
ü
Celebrate Hot August
Nights gather at a wide-open spot for star-gazing. Gather telescopes from
pack members, or contact a local Astronomy club your librarian will have some
contact information.
ü
Another way to get
out the heat have your meeting at night and make and play some of the
suggested nighttime games anything glow in the dark will be a hit! Be sure
to go over rules and boundaries first, and have adults assigned to keep everyone
in the area and out of harms way.
ü
Have the whole den
or pack take part in the local library reading program add to a bookworm
made of overlapping colored paper circles each time a book is read, add a new
segment. The head of the bookworm can include a set of feelers made of pipe
cleaners or black paper, complete with eyes and a big smile. Display the
Bookworm at your meeting place. To celebrate completing the project, donate a
book to the library from the den or pack.
ü
Make fruit leather
and tea using the power of the sun. Directions under CUB GRUB.
ü
Celebrate frogs and
pond creatures check out a book about them, read it with the den, then make
underwater viewers and visit a local pond. Then enjoy a Sherbet Frog from CUB
GRUB.
ü
Take in an outdoor
movie some communities sponsor family Movies in the Park during the summer.
ü
Make Pinhole cameras
and take photos of Summer scenes and happenings
ü
Have a What I did
on my Summer Vacation Night everyone brings pictures and souvenirs from their
favorite or most exciting vacation
ü
Encourage boys to
keep a travel journal, or even just a summer journal, with one page for each
day. Tell where you went, what you did, what you saw, what you learned, then
draw a picture see Fun Family Education website
ü
Make sun prints of
all kinds of things, such as keys, leaves, etc but use dark colored
construction paper instead of costly blueprint paper.
ü
Instead of just
suffering with summertime humidity, make a record of it with a psychrometer. See
directions under THEME RELATED.
ü
Make a sundial and
use it to tell time. Directions in the Dynamic Sun website.
ü
As a service
project, help out a Get out of the heat site in your community or take ice
cold water bottles or slices of watermelon to deliver to people out in the heat.
ü
Invite local seniors
to a cool location, such as your Chartered Organization site, and serve cold
lemonade or ice tea and popcorn, while showing some old movies.
ü
Another easy service
project would be to take along garbage bags, grabbers and gloves when you
visit a local park or water site clean up the area so everyone will enjoy it
more.
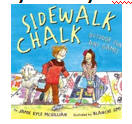
SIDEWALK CHALK,
a book by Jamie Kyle McGillian
Utah National Parks
This book is
great for artist achievements and electives. It has lots of wonderful ideas for
things to draw. Here are a few examples -
P
Square Décor Each
square is an open canvas
P
Rebus Create a
funny saying using pictures as words
P
Creature Features
Each boy take turns drawing parts of a creature
P
Alphabet Art (Names)
Draw names, decorate or create an animal or creature using the letters of name
P
Shape Art What can
you make using only common shapes?
P
Animal Mix-up Head
of a rhino, body of a lion, legs of an ostrich, feet of a duck, etc.
P
Make-up anything!
P
Mazes Size just
right for chalk line or go BIG and make it Cub Scout size!
Good Turn for America
Alice, Golden Empire Council
If your pack
den or pack is doing the Good Turn for America suggested on page 4 in Program
Helps, use this time to put together School Kits for kids living in shelters, or
who have lost homes in recent flooding. Pencils, notebooks, colored pencils,
rulers, scissors, erasers, and other supplies can be picked up in order by
everyone, then put in sealable plastic bags or backpacks and donated.
Grass Blade Whistle
Sam Houston Area Council
Pluck a long,
flat blade of grass and hold it between the edges of both thumbs. The blade of
grass should be in the middle of the gap between your thumbs. Put your lips
against your thumbs and blow hard through the gap. Youll hear a variety of
squeaks and squawks.
Buzzing Bug
Swing this over your head and it
will BUZZZZZ!
Sam Houston Area Council
Materials:
1 3x5 index card,
1 jumbo craft stick (tongue
depressor),
2 small pieces of craft foam (3/4
to 1 wide, and about 2 long),
1 size-64 rubber band (1/4),
string (2-3 feet),
double sided tape,
scissors,
markers.
Directions
1.
Draw a bug on
the index card, color and cut it out. Make sure to use the card horizontally and
not to shorten the bottom of the index card (it will be attached to the craft
stick). The bug should have a large body or wings. Antennae and legs should be
simplified or drawn on.
2.
Attach a piece
of double-sided tape to each of the foam pieces.
3.
Place the uncut
edge of the index card on the craft stick such that the index card covers half
of the width of the stick.
4.
Fold one foam
piece over the end of the stick so that the stick and the index card are joined
together. This will keep the bug in place. (Optionally glue the bug to the
stick.)
5.
Lay a string
across the sticky side of the second foam piece, leaving a loose end of several
inches. Place this second piece of foam over the other end of the craft stick in
the same way as you did previously.
6.
Stretch the
rubber band over the foam covered ends of the craft stick. Use the short end of
the string to knot a loop around the foam, making a secure attachment.
7.
Swing the bug
over your head. If your bug doesnt buzz, adjust the rubber band. Make sure you
have plenty of room away from people and objects. Try different speeds.
Sand Sculptures
Sam Houston Area Council
Materials:
1 cup play sand,
½ cup cornstarch,
¾ cup hot water,
1 teaspoon powdered alum
(available at the hardware store.),
a saucepan
Directions
P
Mix the sand,
cornstarch, and alum in a saucepan.
P
Add hot tap water.
P
Stir quickly until
mixed.
P
Have an adult cook
the mixture over medium heat.
P
Keep stirring until
the mixture becomes thick.
P
Let it cool.
P
Mold the mixture
into the desired shape.
P
When finished, place
the sculpture on a windowsill or somewhere it will get plenty of sunshine.
P
Let it dry for
several days.
P
The sand sculpture
will get so hard it wont have to be sprayed with anything to protect it. It
will last forever!
Cricket Chirper
Alice, Golden Empire Council
Crickets make
their distinctive sound by rubbing their wings together make these chirpers
and you can add to their music on a Summer evening!
Materials:
Two 10-inch wooden skewers
30 ½ inch wooden beads
Scissors
Tacky Glue
Directions:
·
Use scissors to cut
the pointed tips from the wooden skewers.
·
Now thread fifteen
beads tightly onto each skewer.
·
Secure the end beads
to the skewer with tacky glue.
·
When the glue is
dry, rub the beaded sections against each other to hear your cricket chirping!
Create a Box Compass
Alice, Golden Empire Council
Materials:
Square box with sides no more than
2" high (bottom of a half-gallon milk carton)
Cardboard circle small enough to
lay flat in bottom of box
1 1/2" nail with head
1 large paper clip, straightened
Magnet
Glue or tape
Directions:
·
Pierce the center of
the box bottom with the 1 1/2" nail from the bottom up into the box.
·
Take the
straightened paper clip and compare to the diameter of your compass rose. If
longer, trim it.
·
Rub the paper clip
against a magnet for several minutes.
·
Glue or tape wire to
the cardboard circle, slightly off center.
·
On same side, mark
center of cardboard circle and pierce halfway through. place cardboard circle on
point of nail in box. Let circle settle. It will turn gently until one end of
the needle points to north.
·
Create a compass
rose either by printing an online example or drawing your own. it should be the
size of your cardboard circle.
·
Glue the compass
rose to the cardboard circle with the fleur de lis placed where the
needle end points to north.
Create a Water Compass
Materials:
Small paper clip,
straightened
Small piece of
Styrofoam (packing peanut)
Bowl of water
Magnet
Permanent marker
Directions
·
Rub the paper clip
with the magnet for several minutes.
·
Pierce the paper
clip through the peanut
·
Gently place on the
surface of water.
·
Allow the needle
enough time to align along the magnetic fields of the earth. It will then point
north.
·
Test this by gently
blowing on the needle to push it out of alignment.
·
The same end of the
needle should always return to the same direction.
·
Mark the north end
of the needle with permanent marker.
Litter Sticker
Capital Area Council
Use an old
broomstick, tape on a nail at one end.
How Hot Is It?
Alice, Golden Empire Council
Make a Sling
Psychrometer to Measure the Humidity Sometimes it feels a lot hotter than the
temperature. Thats because the relative humidity, or moisture in the air, can
make it seem much hotter. Our bodies are called by the evaporation of
perspiration, and when theres a lot of water in the air, the evaporation is
slowed way down it cant go into already wet air. Heres a fun way to
measure the relative humidity.
Materials:
2
indoor/outdoor wall thermometers
double sided
mounting tape
small lengths
of wire to fasten thru hole in thermometers
6 inch circle
of fabric
rubber band
7x12 piece
of poster board or thin duct tape
hole punch
20 inch
length of cotton string
Instructions:
Cut away a
3-1/2 by 3 inch section from the lower right corner of the poster board.
Tape the two
thermometers to the poster board side by side, with the numbers facing up and
the liquid filled ends sticking over the edge about 2 inches.
Use the wire
to secure each thermometer to the board through the hole in the top, just to be
sure they stay on the board.
Wrap a piece
of duct tape around the top of the poster board about ¾ inch from the top, and
punch a hole in the center.
Thread the
cotton string through the hole and tie the ends together to make a loop.
How to Use
the Psychrometer:
«
Wet the fabric
circle and wrap it around the bottom of the lowest thermometer, using the rubber
band. (This is your wet-bulb thermometer)
«
Grab the loop of
string and swing the psychrometer back and forth waist high in front of you.
Take readings about every minute, until the temperature of the wet-bulb
thermometer stops dropping. (About 2-3 minutes)
«
Write down the
readings for each thermometer.
«
Now subtract the
wet-bulb temperature from the dry bulb temperature to find the difference.
«
If the humidity is
low, the air is dry and the water will evaporate quickly from the wet-bulb, so
there will be a greater difference between the two thermometers.
«
If the humidity in
the air reaches 100%, there will be no difference between the two, since the
water on the wet-bulb has no place to evaporate).
«
Look at the table
below. Find the dry thermometer temperature in the far left column and FOLLOW it
to the right. FIND the difference between the two temperatures on the top, and
FOLLOW it down. The number where the row and column intersect is the relative
humidity.
Difference between the
thermometers:
|
TEMP |
1 |
2 |
3 |
4 |
5 |
6 |
7 |
8 |
9 |
10 |
|
60 |
94 |
89 |
83 |
78 |
73 |
68 |
63 |
58 |
53 |
48 |
|
65 |
95 |
90 |
85 |
80
|
75 |
70 |
66 |
61 |
56 |
52 |
|
70 |
95 |
90 |
86 |
81 |
77 |
72 |
68 |
64 |
59 |
55 |
|
75 |
96 |
91 |
86 |
82 |
78 |
74 |
70 |
66 |
62 |
58 |
|
80 |
96 |
91 |
87 |
83 |
79 |
75 |
72 |
68 |
64 |
61 |
|
90 |
96 |
92 |
89 |
85 |
81 |
78 |
74 |
71 |
68 |
65 |
|
100 |
96 |
93 |
89 |
86 |
83 |
80 |
77 |
73 |
70 |
68 |
You can take your
own humidity reading and then check against what the weatherman says the
humidity is.
Bird Call
Capital Area Council
Materials
1 - 2" long wooden dowel rod *
1 - "chunky" eye screw
1 - Baseball pitcher's powered
rosin bag
* - The Pow Wow book does
not give a size. Dowel rod can be expensive for Cub projects but a replacement
broom stick usually runs me $1.00 to $1.50 or closet rod is usually not very
expensive. CD
Directions
ü
Drill a hole
slightly smaller than the screw threads, in the end of the dowel rod
ü
Turn the screw eye
into it.
ü
Unscrew the eye,
ü
Put some powdered
rosin from a pitcher's rosin bag in the hole.
ü
As you twist the
screw eye back and forth in the hole, very slowly, you will make a chirp-chirp
or trill
ü
With practice, this
simple device will produce an astounding variety of bird noises.
ü
If you wish, paint
or decorate the birdcall with marking pen designs or your own initials or other
means of identification.
HIKE ACTIVITIES:
Capital Area Council
NATURE
SCAVENGER HUNT --
Divide boys into two teams, give each team the following list. Allow 15 minutes
to see how many items they can collect for their team.
1..
Something green
2..
Something blue
3..
Something that
looks old
4..
Something new
5..
Something old
6..
Something gold
color
7..
Something alive
8..
Something dead
9..
Something red
10..
A tree leaf
Upon
returning, see what they can make out of their collection.
Nature
Collages Hike - Take a
hike and collect nature things like bark, twigs, leaves, grass, shells, nuts,
rocks, dried seeds, etc. These items can then be arranged on wooden boards,
poster boards, tiles, etc. Use a tacky glue to glue items down and place a
hanger on the back.
Sand
Casting Hike -- With
items you have collected on a hike you can also sand-cast them. Sand in a box
works fine. Let each boy 'dig a small hole, place his items in the bottom with
the best side pushed into the sand. Mix Plaster of Paris to pouring consistency
and carefully pour in the hole. Let it set about 20 minutes, then lift out, and
brush off the sand. A piece of wire can be pushed in the back while it is drying
for hanging.
Nature
Hike Take along a
book guide and identify plants or animals and what it eats and what it becomes.
Nature
Field Trip Visit
Nature Center or Preserve, Zoo or Game Sanctuary.
Early
Signs of the Season
Look for sign of the season in nature, discussing the changes the plants and
animals go through from spring through summer, fall and winter.
Baby Hike
Look for natures
babies. Plants and animals. Look, but dont touch.
Caterpillar Hike Pair
the boys up and blindfold one of the partners. Have the un-blindfolded boy lead
the other around slowly so they can listen, smell and touch nature while they
try to explain what they hear, smell and feel. Reverse the partners after a
time, blindfolding the boy who was leading the other.
Micro Hike
Lay out several areas
6 x 6 feet with strings and have the boys lay on the ground and look very
closely to what goes on 6 inches from the ground. Discuss what they saw.
Undercover
Hike Try this with
some homemade camouflage and have the boys move very slowly through the woods
stalking what they can. Possibly blacken their faces also, while they test the
wind and listen to the sounds of the forest.
Big Game
Hunt Sight as many
animals as they can and make a list of what they saw and what it was doing.
Shadow
Hike Walk only in the
shadows. This may require some jumping. (Dont try this at noon when the shadows
are the shortest).
Smell Hike
Sniff your way around
the block. Write down the odors that you recognize. How did the smells make you
feel?
Color Hike
Choose a color and
hike only towards that color objects for as long as you can. How far can you
make it?
Sound Hike
Listen to the sounds
as you hike. Write down the sounds that you recognize.
NATURE CRAFTS AND IDEAS:
Capital Area Council
1..
Collect, mount
and name as many seeds as can be found.
2..
Collect, mount
and name twigs from as many trees as possible.
3..
Collect, mount
and name leaves from as many trees, shrubs and flowers.
4..
Collect
feathers, mount and identify or use in picture making.
5..
Make and paint
totem poles out of rocks.
6..
Paint rocks to
resemble animals--i.e. turtle, ladybug, beetle, etc.
7..
Paint rocks for
paperweights.
8..
Dye sand with
food coloring and use to create pictures.
9..
Make Plaster of
Paris molds of animal tracks.
10..
Use Plaster of
Paris in dish gardens to create pools or planting areas.
11..
Make star
charts.
12..
Learn
circumpolar constellations and mythology.
13..
Go on a star
gaze (a strong beamed flashlight helps as pointer).
14..
Make a pin hole
constellation from tin can or milk carton... shine light in the inside to
reflect stars against wall.
15..
Make cloud
charts with cotton.
16..
Make simple
barometers.
17..
Paint and draw
with ink made from berry juices.
18..
Recognize edible
plants and berries.
19..
Weave mats out
of grasses and reeds.
20..
Make an insect
net out of coat hanger, stocking hose, or cheesecloth.
21..
Carve or paint
shelf fungus.
22..
Go on a bug hunt
with hand-made boxes and jars.
23..
Carve simple
nametags, whistles, and letter openers.
24..
Study different
soils, collect, plant, test, and grow things
25..
Play tree
tag--only safe when touching certain type of tree.
26..
Make terrariums
out of wild plants found.
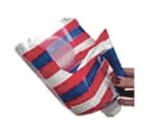
BALL CATCHERS
Utah National Parks
Here is a good way to recycle your
old plastic laundry detergent bottles or plastic milk jugs, and
have lots of fun afterwards.
NOTE:
The plastic bottles can be hard to cut, so have help available for that step.
Materials:
2 Plastic milk jugs or laundry
detergent jugs
Sharp scissors
Colored electrical tape or paint
markers
Small rubber ball or tennis ball
or socks
Directions:
P
Rinse the milk or
detergent jugs well before starting. (You will not be able to get the jug
completely clean until the bottom is removed)
P
Use the sharp
scissors to cut the milk carton or detergent jug.
P
First cut off the
bottom, then cut a U shape under the handle. (I usually do not cut the U
shape under the handle. CD)
P
Make sure you don't
cut into the handle so you can hold onto the jug while catching the ball.
P
After cutting the
bottom off, thoroughly wash and dry the jug.
P
Use the colored
electrical tape or paint markers to decorate the jugs.
P
Have fun playing
catch and toss.
BALLOON LAUNCHER
Utah National Parks
Materials:
Scissors
Plastic lid (e.g. from butter or
cottage cheese container top)
Push/pull squirt cap (e.g. from
dishwashing liquid bottle top)
Glue
Round balloon
Directions:
ü
In the center of the
plastic lid, cut a round hole ¾ inch in diameter.
ü
With the lids
writing facing up, center the squirt cap over the hole and glue into place.
Use enough glue so that no air can escape.
ü
Allow glue to dry
completely.
ü
Blow up a round
balloon and slip the opening of the balloon over the opening of the closed
squirt cap.
ü
Place your creation
on a smooth surface.
ü
Lift the squirt cap
opening so that air escapes from the balloon.
ü
Your launcher will
glide effortlessly!
OUTDOOR CLOCK
Capital Area Council
Materials:
12 x 12 cardboard
empty thread spool
glue
pencil
Directions
ü
Glue spool to center
of cardboard and
ü
Glue the pencil in
the hole of the spool, pointy end up.
ü
Choose a sunny day
and take the clock outside at 9:00 AM
ü
Place the clock in a
sunny spot and the pencil will cast a shadow.
ü
Mark where the
pencil point ends.
ü
Do the same at
10:00, 11:00, etc.
ü
You can do this
every hour until it gets dark.
ü
The next day check
that it does the same thing.
ü
You have made a
sundial
WINDSOCK
Capital Area Council
Materials:
1 - 9"x12" piece fun foam
Several ribbon pieces 13 long
1 - piece of ribbon 24" long
Glue
Directions
ü
Cut foam in half
length-wise.
ü
Glue 13" ribbons on
one long end with a 1/2 inch between pieces.
ü
Glue short ends
together to form the windsock.
ü
Glue 24" ribbon on
the inside of foam at the top for hanging.
ü
You can decorate
with anything you want, i.e.: sequins, pom-poms, silk flowers, beads, lace,
markers.
Recycled Wind Sock
Capital Area Council
Here is a fun way to utilize
"trash" to make a festive craft that also reminds us to appreciate the clean,
fresh air that we breathe.
Materials:
Plastic tub with lid (butter, whip
cream)
Old party streamers/Crepe paper
Old Ribbon
Used, clean plastic bags
Directions
P
Cut the bottom of
the plastic tub out, and
P
Cut the center out
of the lid, leaving the outer ring.
P
Cut 3-foot streamers
from the crepe paper, ribbon and plastic bags.
P
Arrange them around
the rim of the tub so that they hang down over the edge. (You can also attach
bells or metal washers to the ends of the ribbon for sound effects!)
P
Snap the lid over
the rim of the tub to hold the streamers in place.
P
Tuck the 2 ends of a
piece of ribbon under the lid, so that it forms a hanger.
P
Hang your wind sock
in the breeze!
Recipe for a Rainbow
Capital Area Council
Materials:
Bowl of fresh water,
small mirror,
piece of white paper,
direct sunlight.
Directions
ü
Prop up the mirror
in the bowl of water so that it lies mostly underwater and reflects sunlight.
ü
Hold the paper above
the mirror so the reflected sunlight hits it.
ü
Hold the paper
steady.
ü
You should see the
colors of the rainbow appear on it.
ü
Do not look at the
reflected sunlight in the mirror. It could damage your eyes.
Kite Neckerchief Slide
Capital Area Council
Materials:
Clean, unused foam meat tray (or
Fun Foam)
Toothpick
Yarn
Slide Ring (1" long, 3/4" Diameter
PVC pipe)
Glue
Directions
Cut kite
shape from a foam meat tray.
Tie two
toothpicks together crosswise and glue.
Cut point off
picks to proper length for kite, and glue on kite.
For tail,
knot yarn and glue in place.
Glue on slide
ring.
Owl Neckerchief Slide
Capital Area Council
Materials:
1 - tree cookiea ¼ to ½ thick
slice of about 2 in diameter branch.
Acorn caps
Orange Bump Chenille
Marker
Ring (PVC pipe, drapery ring, your
favorite)
Glue
Directions
·
Glue on 2 acorn caps
onto the tree cookie facing outward for eyes.
·
Use marker for
center of eyes.
·
Glue on one bump of
orange bump chenille folded in half for beak.
·
Glue a ring on the
back.
TIN CAN LANTERN
Utah National Parks
Materials:
Large tin cans, label removed
Markers
Towel
Hammers
Nails
Small screw-in hook
Stick or wooden dowel (about 20"
long)
Coat hanger (for hanging loop)
Votive candle
Directions:
P
Fill cans with water
and freeze for two days. (The ice keeps the sides from collapsing while
hammering.)
P
On the outside of
the can, have Cubs draw a pattern for the lantern holes.
P
Place can on its
side on top of a towel and use the nail tips to hammer in holes according to
the design.
P
Make two holes near
the top on opposite sides for stringing a handle.
P
Remove any ice
chunks from can.
P
Screw hook into one
end of stick or dowel then string length of wire through hook.
P
Thread wire through
handle holes made in can.
P
Crimp closed until
secure.
P
Use melted wax to
stick votive to bottom of can.
P
Use a long match or
spaghetti noodle to light.
BUBBLE CONE
Utah National Parks
Here is a
sample of what you can find at
http://www.zurqui.co.cr/crinfocus/bubble/bubble.html
If you go
there the steps are completely illustrated.
Materials:
Plain white paper (2 sheets each)
Masking tape
Scissors
Directions:
«
Roll two sheets of
paper into a tight cone or tube.
«
Small end can be a
closed point, large end should measure about 1 ½ inches.
«
Tape edge closed
with masking tape.
«
Place tape about 3
inches from pointed end.
«
Cut the mouth or
small end of the cone so there is an opening approximately 1 cm. In diameter.
«
Look down the
opening of the tube and judge the distance to where there are various layers of
paper.
«
Cut down to this
level and then start cutting around the tube, making the final cut where you
started.
«
Edge should be
smooth and cone should stand upright.
«
Trim to make
adjustments if necessary.
For completely illustrate
instructions go to
http://www.zurqui.co.cr/crinfocus/bubble/tube.html
MONSTER BUBBLES
Utah National Parks
Materials:
6 cups water (Distilled is best)
3/4 cup corn syrup (Karo Light)
2 cups Joy (or Dawn) dish washing
liquid
Directions:
«
Mix together.
«
Let set 4 hours (to
let bubbles settle), then enjoy.
How to use
cone and bubbles:
ü
Fill a shallow dish
with Monster Bubbles.
ü
First dip: dip cone
for 30 seconds.
ü
Other dips: 2 sec.
ü
Begin blowing
downward and move slowly up as bubble grows.
ü
When the bubble is
the size you want, you can separate it from the cone by rapidly flipping the
cone up or down.
For more formulas for bubble
mix and tricks with bubbles go to
http://homeschooling.gomilpitas.com/explore/bubbles.htm
BOOMERANG
Utah National Parks

Heres how to
make your own returning boomerang out of cardboard. Give it a whirl!
Materials:
Cardboard measuring 8" x 11"
Color markers
Scissors
White glue or stapler
Directions:
After you
assemble the materials go to -http://www.nationalgeographic.com/ngkids/trythis/try11.html
And get the
blade patterns and all the details on building this boomerang.
When you are
ready to fly it, follow the tips below.
«
Find an open area
outdoors away from other people.
«
With your arm
raised, hold your boomerang vertically (pointing up) by one of its blades so the
curved tips bend toward you.
«
Throw the boomerang
with a quick snap of your wrist using just a little force.
«
Throw it like you
would a baseball.
«
Adjust the folds and
practice your throw to make the boomerang fly better.
Tie Slide - Life Preserver
Capital Area Council
Materials:
White 1 ½
round plastic buckle (from a fabric notions department),
Red acrylic
paint.
Instructions:
Use paint to
make rope lines around the life preserver.
Let dry
before threading scarf through the buckle.
Rocks, Shells and Fossil Prints
Capital Area Council
Mix:
1/2 cup cornstarch
1/2 cup salt
3/4 cup flour
Add:
Warm water to make into a dough
ball
ü
The dough can be
rolled, formed or used to press shells, rocks or other natural found objects
into.
ü
Let the dough air
dry, turning each day until dry or microwave one minute on each side.
ü
It may be necessary
to adjust the microwave time according to the thickness of the dough and
microwave temperature.
ü
Dry dough can be
painted with tempera
Make Your Own Fossils
Capital Area Council
The paleontologist uses this
technique in reconstructing the shells of long-dead animals. Casts are
especially useful in working with fossil footprints
Materials
Small cardboard box,
Clay,
Plaster and water,
Small snail or clam shell.
Directions
1)
Cover the bottom
of the box with modeling clay to a depth of several inches. This represents the
soft mud found on the ancient sea floor.
2)
Press the shell
firmly into the clay. Lift out carefully so a clear imprint remains, making a
mold.
3)
Mix a small
amount of plaster with water in paper cup. Stir with a spoon until thick, and
then pour over the mold.
4)
After the
plaster has dried, carefully remove it from the mold. This is now a cast of the
original shell.
5)
Compare the
original shell with the plaster cast. Notice that even some of the more
delicate markings have been preserved. Compare your cast to some real
fossilized stones.
VINEGAR ROCKET-LAUNCHER
Capital Area Council
Materials:
Quart plastic soda bottle
Water
Vinegar
Baking Soda
Paper towel
Cork
Thumbtack
Ribbon steamers
Directions
1.
Put ½ cup of
water and ½ cup of vinegar into a quart plastic soda bottle.
2.
Put a teaspoon
of baking soda on a 4 x 4 piece of paper toweling.
3.
Roll up the
paper and twist the ends to keep the baking soda inside.
4.
Outside, where
youll have plenty of altitude available, drop the paper into the bottom of the
bottle and put the cork on as tightly as you can.
5.
Eventually The
cork shoots skyward with a loud pop!
What is
Happening
«
The liquid slowly
soaks through the paper toweling.
«
Then the baking soda
reacts with vinegar to produce carbon dioxide gas.
«
As more gas forms,
pressure builds up inside the bottle.
«
You cant have an
accurate countdown, so just stand back wait.
«
Eventually the
pressure causes the cork to shoot skyward with a loud pop!
MORE GAMES AND ACTIVITIES
Sam Houston Area Council
From the Cub
Scout Leader How-To Book
ü
-How to Hold a
Summer Celebration, page 6-18 to 6-20
ü
-How to Hold a Pack
Picnic, pages 6-22 to 6-23
Materials found in Baloo's Bugle may be used by Scouters for Scouting activities provided that Baloo's Bugle and the original contributors are cited as the source of the material. |
|